
Micro cracks are small, but the damage they cause can be serious if they go unnoticed. These tiny defects often form deep inside components where visual access is limited.
They may begin as surface imperfections caused by heat, pressure, vibration, or repeated use. Over time, these cracks expand, weaken materials, and increase the risk of unexpected failure.
A borescope allows inspectors to spot early warning signs without taking the equipment apart. This makes inspections faster, less disruptive, and more cost-effective.
With the right inspection process and a careful approach, teams can identify micro-cracks before they turn into costly or dangerous issues that affect safety and performance.
Why Micro-Crack Detection Matters
Micro-cracks usually develop due to heat exposure, mechanical stress, vibration, pressure changes, or material fatigue. At first, they are barely visible and easy to overlook. As they grow, they compromise structural integrity and reduce the lifespan of critical components.
Early detection reduces downtime, prevents unexpected breakdowns, and supports safer operations. It also helps maintenance teams plan repairs instead of reacting to failures.
Borescope inspections enable regular checks, keep equipment in service longer, and reduce unnecessary disassembly.
Step 1: Learn What Micro-Cracks Look Like
Knowing what to look for is the first step in successful detection. Micro-cracks often appear as thin, hairline lines that may follow the grain of the material or develop near welds, edges, joints, or stress concentration points.
Some cracks only become visible at specific viewing angles or lighting conditions. Others show up as faint dark lines, uneven textures, or slight surface breaks. Experience plays a major role here, but careful viewing and patience make a big difference even for less experienced inspectors.
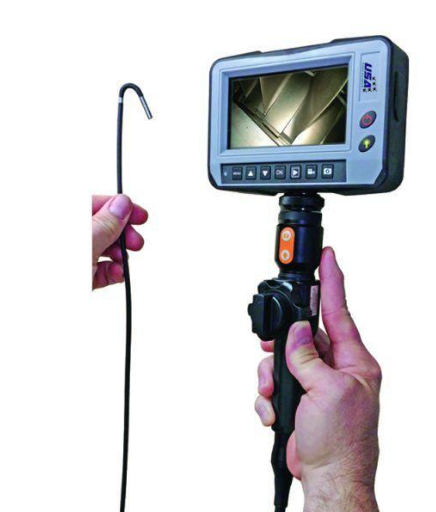
Step 2: Select a Suitable Borescope
Resolution and lighting are key when searching for small defects. A clear, sharp image helps reveal surface changes that lower-quality tools may miss entirely.
Choose a borescope with a probe diameter that fits the access point comfortably. The camera should be capable of showing fine surface details without distortion.
Flexible articulation is also important, as it allows the camera to reach tight or curved areas where cracks often form. Adjustable focus and brightness controls further improve inspection accuracy.
Step 3: Prepare the Inspection Area
Preparation improves inspection quality. Clean the access point before starting to remove dirt, oil, or debris. Contaminants can hide cracks or create shadows that look like damage but are not.
Make sure the system is powered down and safe to inspect. Follow safety procedures and wear appropriate protective gear if required. A clean and stable inspection environment allows clearer visuals and more confident decision-making.
Step 4: Adjust Lighting and Camera Settings
Lighting is critical for spotting micro-cracks. Excessive brightness can wash out fine details, while low light hides surface features completely.
Adjust brightness slowly until surface textures appear clear. Slightly angled lighting often helps create shadows that make cracks easier to see.
Focus adjustments should be made often as the distance between the camera and the surface changes. Taking time here significantly improves detection results.
Step 5: Insert the Borescope With Care
Insert the probe slowly and without force. Sudden movements can damage internal surfaces or the inspection equipment itself.
Use articulation controls to guide the camera toward stress points such as weld seams, corners, edges, and heat-affected areas. Move steadily and pause often to examine the image closely. Rushing through insertion is one of the most common causes of missed defects.
Step 6: Follow a Consistent Inspection Pattern
Inspecting in a structured order helps prevent missed areas. Choose a pattern that fits the component, such as moving clockwise or inspecting from one end to the other.
Rotate the camera slightly and view surfaces from multiple angles. Some micro-cracks only appear when the lighting and viewing angle align just right. A consistent method improves accuracy and makes inspections easier to repeat over time.
Step 7: Use Focus and Magnification Properly
Magnification can help reveal fine cracks, but too much zoom may reduce clarity and depth perception. Adjust gradually until the surface remains sharp and detailed.
Refocus often. Even small changes in distance can blur fine details. Clear focus is one of the most important factors in micro-crack detection, especially when inspecting smooth or reflective surfaces.
Step 8: Watch for Supporting Signs
Micro-cracks often appear with other surface changes that indicate stress or wear, including:
- Heat discoloration
- Pitting or rough texture
- Coating wear or separation
- Branching surface lines
These signs often point to areas under stress where cracking begins. Documenting these warning signs helps build a clearer picture of component condition and potential future risk.
Step 9: Record Images and Video
Clear documentation helps track changes over time. Save images and videos with labels that include the inspection date, location, and component details.
Comparing inspection records helps determine whether a crack is stable, growing slowly, or spreading rapidly. Visual records also support communication among inspection teams, engineers, and decision-makers.
Step 10: Compare Results With Acceptable Limits
Review findings against manufacturer guidelines or industry standards. Some micro-cracks may be acceptable for short-term use, while others require monitoring, repair, or replacement.
If results are unclear, share images with engineers or quality teams for further review. Clear visuals make evaluation easier and reduce guesswork during decision-making.
Step 11: Remove Equipment and Secure the Area
Withdraw the borescope slowly while monitoring the live feed. This prevents accidental contact with internal components.
Clean the probe after use and store it properly in accordance with the guidelines. Good equipment care ensures consistent inspection quality and extends tool life. Secure access points and confirm the system is ready for operation.
Why Routine Micro-Crack Inspections Matter
Regular inspections reduce unexpected failures and improve overall reliability. Addressing small defects early helps extend equipment life and lowers maintenance costs.
Routine inspections also help create safer working environments by reducing the risk of sudden breakdowns. Over time, consistent inspection practices improve confidence in maintenance decisions and operational planning.
If you are looking to enhance your micro-crack detection process, improve inspection accuracy, and identify hidden defects before they turn into serious problems, reach out to them for expert guidance and reliable inspection solutions.
USA Borescopes offers tools designed to support clear visuals and confident maintenance decisions.
About the Author
This guest post was written by an industrial inspection and maintenance writer specializing in borescope inspections, visual testing methods, and early defect detection. Their work focuses on turning technical inspection practices into clear, practical guidance that helps professionals identify issues early, reduce risk, and maintain safer, more reliable equipment across a range of industries.